Choose the right wet polishing pad
● Material hardness: Determine the hardness of the material being processed. Softer materials such as marble or limestone require softer wet polishing pads to prevent excessive material removal and achieve a smooth surface. On the other hand, harder materials like granite or concrete require a more abrasive pad to effectively remove the material and achieve the desired results.
● Grinding or polishing requirements: Determine the specific grinding or polishing requirements of your project. If your goal is a high gloss finish, choose a wet polishing pad with fine grit. For heavy-duty grinding operations, consider using a wet polishing pad with a coarser grit for efficient material removal.
● Surface Quality: Consider the surface quality required for your project. Different wet polishing pads are designed to achieve specific finishes, such as a high-gloss, mirror finish, or a textured, matte finish.
● Material Compatibility: Make sure the wet polishing pad you choose is compatible with the material you're working with. Different materials require specific wet polishing pads for best results. Verify that the wet polishing pad you choose is suitable for use with the material you are working with.
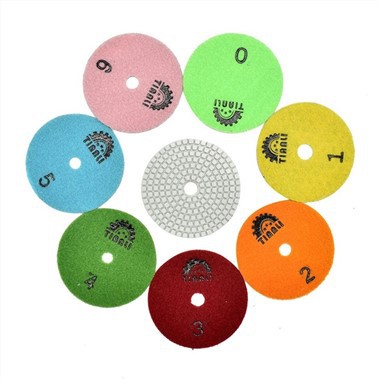
● Particle size: Consider the particle size of a wet polishing pad, which refers to the grade of abrasiveness. Coarse particle sizes are suitable for initial grinding and material removal, while finer particle sizes are better for achieving a polished surface.
Install wet polishing pads
First, make sure your grinding or polishing equipment is turned off and unplugged or disconnected from any power source. Pick up the wet polishing pad and inspect the mounting holes on the device. Make sure the wet polishing pad matches the size and pattern of the mounting holes. Align the mounting holes of the wet polishing pad with the corresponding holes on the device. Once properly aligned, place the wet polishing pad over the device, making sure it is firmly and evenly seated on the surface. Depending on your specific equipment, you may need to use nuts or fasteners to hold the wet polishing pad in place. Consult the device's instructions or user manual for the correct method. Using an appropriate tool, such as a wrench or screwdriver, tighten the nuts or fasteners to ensure the wet polishing pad is securely attached to the equipment. Once the wet polishing pad is securely attached, you can connect the device to a water source if wet polishing is required. Again, refer to the device instructions for the correct water connection method. Once everything is properly installed and connected, you can turn on the equipment and start the wet polishing process.
Wetting wet polishing pads
Prepare a clean container or bucket with water or a recommended wetting agent. If using a wetting agent, follow the manufacturer's instructions for proper dilution. Dip the wet polishing pads into water or a wetting agent, making sure they are completely submerged. Let the wet polishing pad soak for a few minutes to fully absorb the moisture. Remove the wet polishing pad from the water or wetting agent and allow excess liquid to drain. Gently squeeze or wring out wet polishing pads to remove excess water, making sure they are moist but not dripping. Attach the wet polishing pad to the appropriate equipment according to the instructions provided by the manufacturer. Begin using the wet polishing pad on the desired surface, applying even pressure and moving in a consistent pattern. Check the humidity of the wet polishing pad regularly during use. If they start to dry out, reapply water or moisturizer as needed. After completing the wet polishing process, clean the wet polishing pad thoroughly and allow it to air dry, then store it for future use. Remember to wear appropriate personal protective equipment, such as gloves and goggles, when wetting and using wet polishing pads.